Thursday, September 30, 2010

Goodbye September! Hello Annuals.

We've been preparing and planting a lot of vegetable beds in the last few days. Ash prepared the annual vegetable beds with sheet mulching and soil amendments, then gave the beds a nice cool-weather quilt of straw. We planted broccoli, cauliflower, spinach, arugula, red lettuce, red kale, and lacinato kale. Ash also sowed red clover and white clover seeds into the trenches, and covered them with straw. They are sprouting very quickly because of all the rain!!


33561_861965566958_2731952_47870871_2790289_n

Close up of the prepared beds (sheets of cardboard, newspaper, dirt, amendments, then straw):

39556_861965976138_2731952_47870878_7865880_n

Holes parted in the straw to plant leafy greens:

62853_861966784518_2731952_47870918_1723460_n

Sprouts in the swales:

36053_861967772538_2731952_47870967_7424089_n

Straw over trenches by the pear tree, and in the nearby swale:

46311_861968900278_2731952_47871025_3896647_n

Straw over trenches in between fig trees:

46995_861970821428_2731952_47871175_948642_n

Sunday, September 26, 2010

Work Day 5ish.

September 24-26th.

This weekend we worked (ok, mostly Ash) half days here and there. Ash finished planting and mulching the blueberries and their support plants. The cardboard down the middle is a future path that will be mulched with wood chips. We also mulched the figs, the pear tree, and the pomegranate tree that we planted after our wedding. Ash added top soil into the swales, into the trenches around the pear tree and in between the figs, and then he sowed red clover seeds. This is a cover crop that will die in the spring and release nitrogen into the soil, feeding the plants and keeping other weeds from growing around the trees... it will also look really nice.

AND NOW IT IS RAINING!

Pom:

IMG_0922

Blueberries with path:

IMG_0925

Pear:

IMG_0923

Friday, September 24, 2010

Work Day Four

Thursday, September 23rd

Keith and Kate from Bountiful Backyards came back to help us today. We were very excited to GET STUFF IN THE GROUND!!

The first thing we did was fill two wheelbarrows with water, and add some super juice to feed the plants. This eases the transplant shock by giving the roots a big growing boost. You can soak the plants for up to a full day, if they look like they need it. The one we used was made of kelp.

IMG_0848

IMG_0850

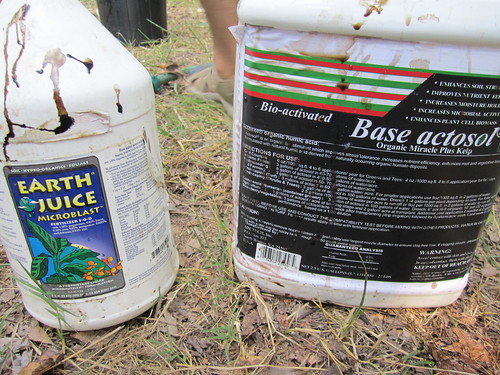
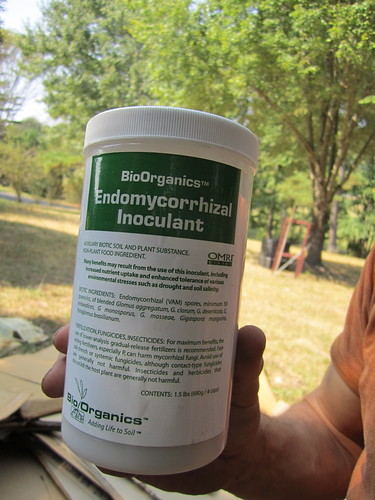
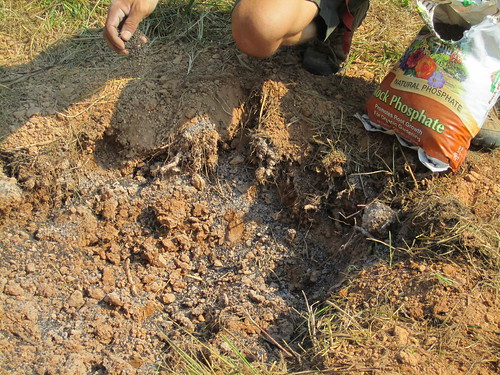
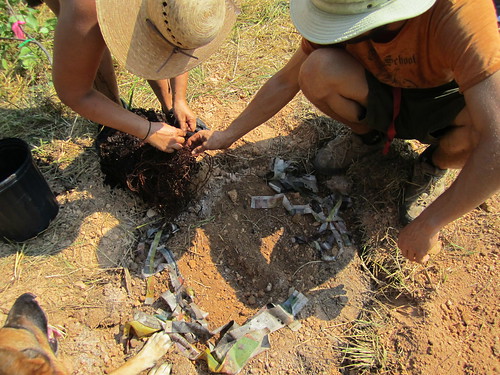
Then we made a soil amendment mix. Gypsum is a mineral, the same they use in sheet rock. Two handfuls per tree will help break up that NC clay and turn it into nice top soil quicker. The remaining mix was bonemeal, green sand (potassium), lime, and kelp meal. The mix was about 3 parts gypsum, 1 part everything else. Phosphate (orange bag in photo) and mycorrhizal inoculant (mushroom spores!) were also used on each plant, but not mixed in to the bucket pictured, with the rest. You need about one TINY pinch of inoculant per plant, and a varying amount of phosphate per plant.

IMG_0853

IMG_0864

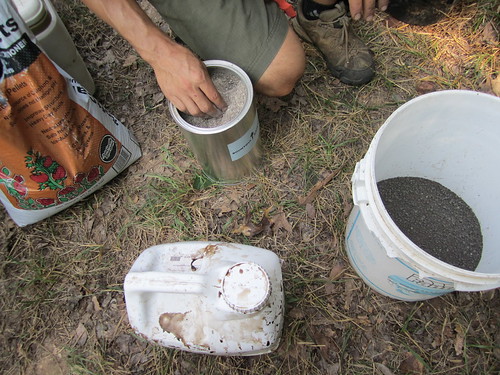
We then went to the pear tree holes, and sprinkled in 5 handfuls of soil amendment mix (see bucket) and phosphate (see orange bag).

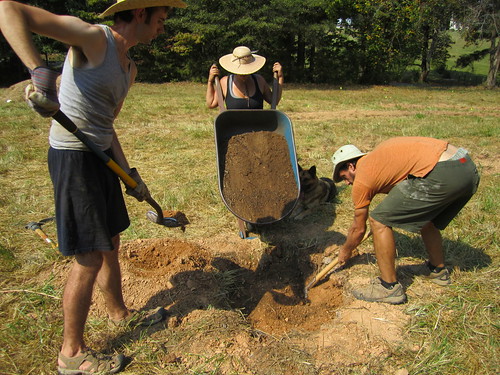
Then Ash mixed in native soil while Kate dumped in purchased top soil, and Keith stirred it all together. Then we added another handful of soil amendment mix.

IMG_0859

IMG_0857

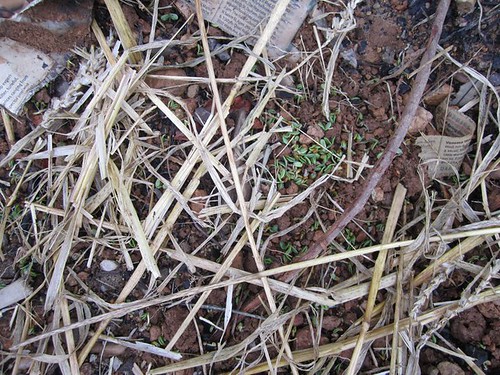
After soaking strips of newspaper (soy based ink only!!) in the plant juice, we placed that in the hole as well. This is for the inoculant. If you look closely, you can see that we made a tiny dirt ridge in the center of the hole. This is called "butterflying" so we can separate the roots of the potted plant on each side of that ridge. You can see Kate and Keith showing us how to gently separate the roots of the asian pear tree in the photo.

IMG_0869

Then, we added more purchased top soil and a little more native soil. Keith gently stepped in the soil to press the tree into it's new home.

IMG_0871

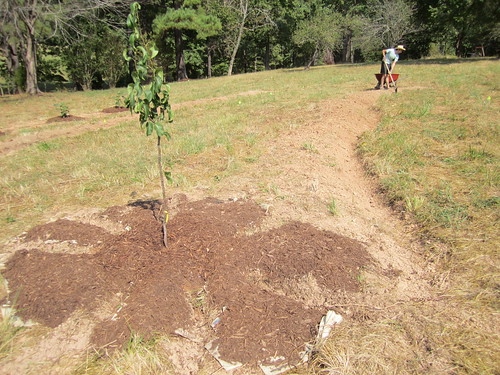
We then sprinkled on more soil amendment mix, and Keith formed a ridge on the downhill side of the plant, to help the tree collect and hold water better.

IMG_0874

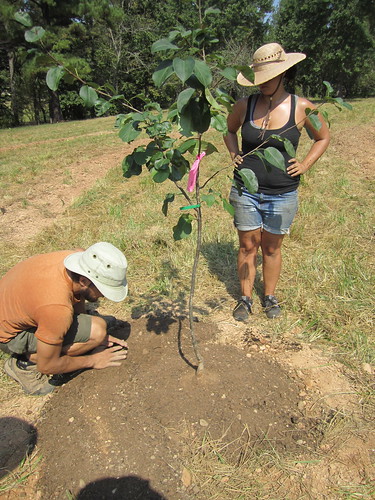
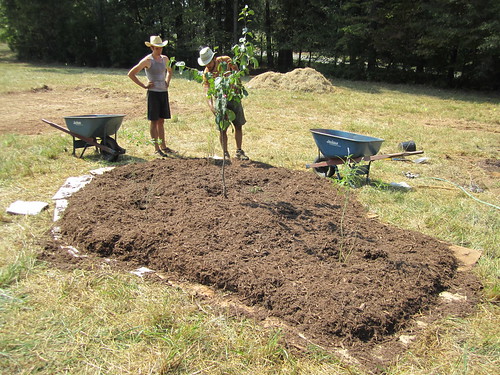
Then we planted our asian pear tree a bunch of friends!! These are called support plants.

IMG_0877

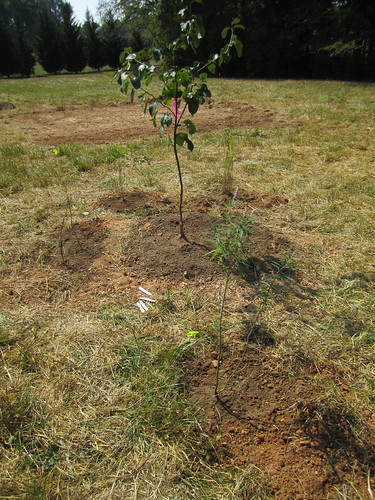
Lupine brings nitrogen from the air into the soil. When you cut the plant in early spring, this signals the roots to release the nitrogen into the soil, fertilizing your tree. You can bury the cuttings under the mulch for further nutrition for your tree.

Yarrow was planted for a ground cover. It will spread as we cut and transplant it. It also accumulates calcium in it's leaves, and pear trees love calcium!! Deer don't like the smell of it, but pollinators are attracted to it. It is also medicinal for humans. What a plant!!

Bush Sage was planted because it smells strongly, which deer don't like. It also has nice flowers to attract pollinators, and is very pretty to look at.

Bronze Fennel- somehow I am missing my notes on this plant...

Shenendoah Switch Grass makes noise at the slightest breeze, and deer do not like to be surprised by rustly noises. If you want you can cut every few months and place that under the mulch as well.

Comfrey will be planted as soon as it comes in to the store next month. Comfrey is a great nitrogen fixer and it spreads really well for ground cover. You can also bury these leaves under the mulch near your tree for nitrogen.

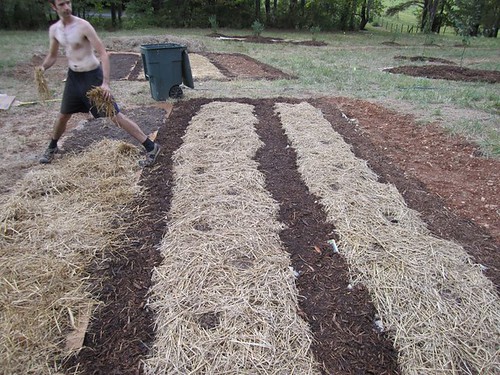
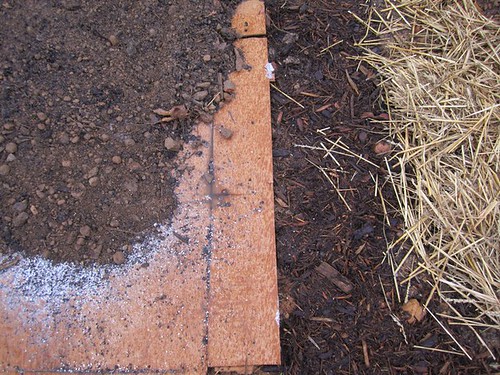
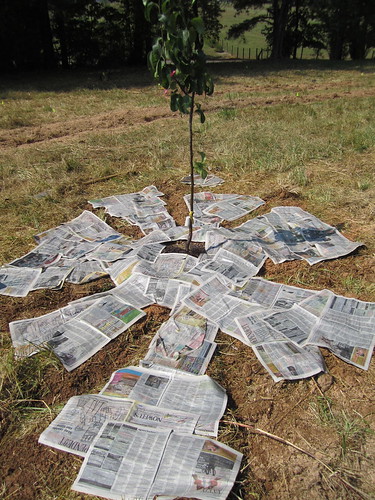
We then covered the ground in soaked newspapers, being sure to cover every gap of soil. This saves you a lot of weeding work later. Especially because we put a layer of soaked cardboard on top of the newspaper layer!!

IMG_0886

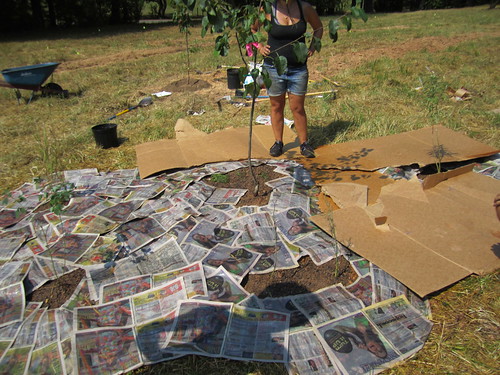
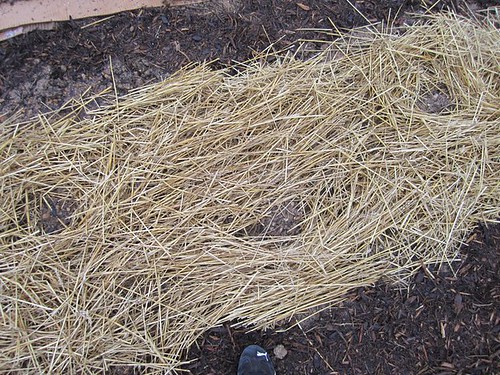
Then... we put a layer of mulch. DONE!!

IMG_0891

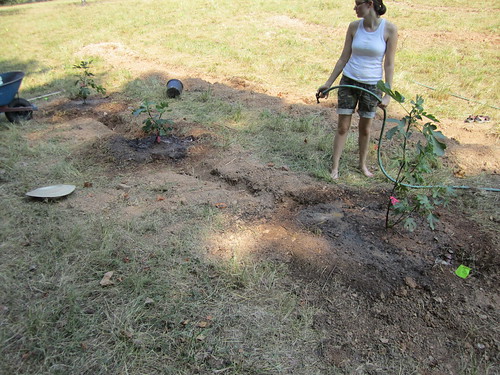
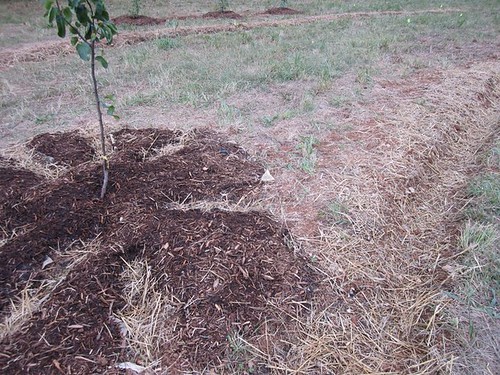
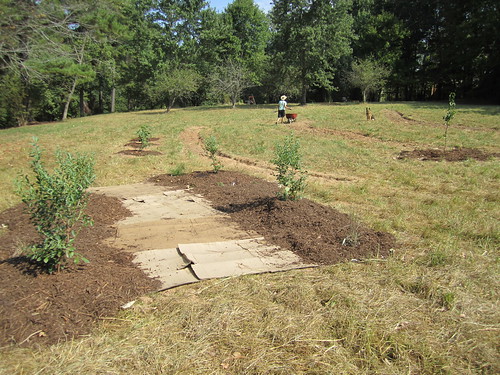
On the other pear tree, we did a different technique for planting support plants. We made trenches radiating out from the tree, which you can see in this photo. The trenches will be filled with nitrogen fixing cover crop (probably red clover).

IMG_0894

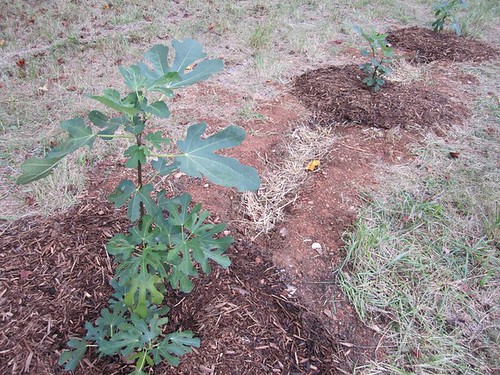
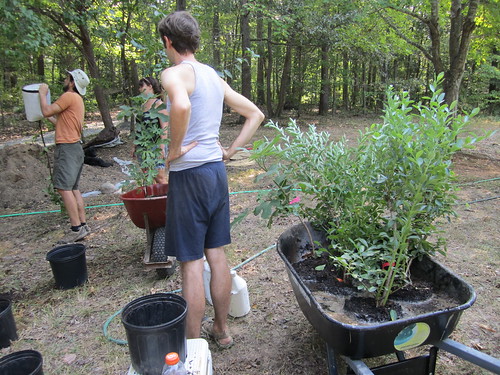
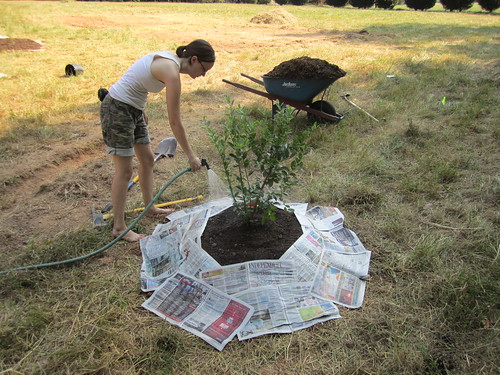
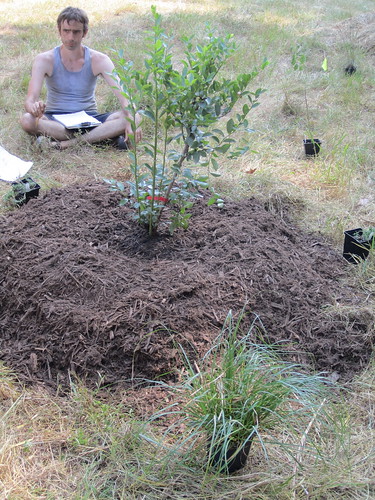
Then Kate and I worked on the figs. Remember we dug one big long trench for the figs. Keith and Ash worked on the blueberry bush. We did not dig a hole for the blueberry bush. They scrapped the grass off with a hoe, and then used a pick-axe to break up the soil on the surface. They built the bed UP for the blueberry bush, using a lot of purchased top soil, potting soil, and soil amendments. The blueberries have this little ridge surrounding them for water retainment. Then we again soaked newspaper for the blueberry. The figs do not have newspaper or mulch yet, because we have to plant clover and wildflowers in the trench between the fig trees. The planting of the figs used the same technique as the pear trees, only they didn't need as much phosphorus. You can see around the blueberry bush that we are laying out more support plants. I don't have any info on those plants yet.

Blueberry:

IMG_0900

IMG_0906

Figs:

IMG_0902

Monday, September 20, 2010

Work Day 3 and 4- Slow going

Sunday:

We did some work in the morning, and Jonathon helped us out a bunch with his super duper pick-axe skills! Even Quinten and Lucky stopped by for about 15 minutes. We spent a lot of time making the swales wider and straightening them out a bit. Then we started to double dig the second vegetable bed.

IMG_0835

IMG_0834

IMG_0823

After lunch we went to see Bountiful Backyard's "Two Ton Garden" in downtown Durham, on the Piedmont Farm Tour. They showed us some plants they just ordered We might buy some to get planted this week, if we have time.

Photobucket

Monday, Work Day 4-

Ash was alone in the field today. I was in the house, organizing what may be a last minute trip to Europe this fall. He used the tractor to try and dig the other vegetable bed, which we had started to double-dig by hand the day before. He did a little maintenance on the compost piles, and then came inside to help my mom clean the kitchen for our guests tonight.

Saturday, September 18, 2010

Breaking ground

We have finally started!! I don't remember when I first heard of forest gardening, but I have wanted to plant one of my own ever since. Forest gardens are based on organic and permaculture principles. Basically, you want your garden to work just as well as nature does. Nature grows up, and builds layers of canopy and mosaics of different species. Traditional farming does not work this way- crops are susceptible to disease, drought and pests in ways nature is not, because crops are grown in ways that nature does not grow things (in rows, in monocultures, and with synthetic fertilizers). Forest gardens take time and initial investment, but over time they require less and less maintenance. Just as natural forests provided food for humans for thousands of years before agriculture was invented, your forest garden will provide an abundance for you that rivals traditional organic farming methods.

To learn more about the future of food, energy issues, and forest gardens, watch this documentary: A Farm for the Future.

With the help of Bountiful Backyards we started Thursday, September 17th.

Here are a couple photos of what the area looks like now. It is probably about 2 acres:

the field we are turning into a forest

some existing apple trees and pom tree

And here is what it will look like eventually, according to Bountiful Backyard's plans:

forest garden plans

There are little yellows flags all over the field, representing different trees:

flags mark where trees are going

First we had to sharpen our tools. This pick-axe is about 40 years old. Note the lack of safety gear...

sharpening the blade

Day One:

Three of their people and two of our people dug two swales and a vegetable bed by hand (we used pick axes, shovels, hoes, and rakes). It took 5 hours! A swale is a ditch that runs across a slope. It slows and collects water as it runs perpendicular to the swale and down the slope. The swales helps the soil collect and store water. Trees are planted along the swale so they can be self-watered.

The vegetable beds were dug using a method called "double-digging". First we scraped off the grass where the bed was going in. Then we covered the whole area in a layer of the top soil we bought. We dug one shovel's-length down in one section of the bed, placing that dirt in a wheelbarrow. Then we moved the dirt from an adjacent section into that hole. We continued this pattern all the way down the bed, until we put hole number one's dirt into the last hole, from the wheelbarrow. Confusing, I know! This mixes all the dirt really well while also aerating the soil, making it easier for our plants to grow.

Here is a photo of the vegetable bed we double-dug. It looks so dry because of the lack of rain:

veggie bed

Here is a photo of a swale and my dad:

swale, dad, tools

We also saw a pretty black rat snake, but I didn't get his picture. We called him a good omen. I saw dozens of large brown spiders too. I think they were funnel web spiders because I saw tornado-looking spider webs in the grass before we mowed.

Day Two:

My husband and I are joined by my father. No Bountiful Backyard workers today. First we got all of the cut grass into what will be compost piles. Then my husband used a weed-whacker to mark where the next swale must be dug, and where the holes will be dug for trees. We use my dad's Kubota tractor and attachments to speed up the job that took 5 hours by hand the day before. The front loader was very useful for hauling hay around. My dad also used the front loader to scrape away all the grass where the vegetable beds are going. Then we hooked up the post-hole-digger and made a series of holes that we shaped with hand tools, like the pick axes. It's amazing how much time it takes to do simple tasks when finicky machinery and large-scale things are involved. But it certainly takes much more time to do by hand.

Well, we spent most of our time trying to dismantle the old garden bed, as seen in the photo bellow. The metal posts were totally stuck in the ground, they almost tipped the tractor when we tried to use a chain to pull them up:

tearing the old fence down

Here is a photo of the swale being dug by the post-hole-digger. My husband is driving:

ash using post hole digger on tractor

digging swales

Here is me on the tractor, moving hay into piles:

i'm a farmer!

Here is a photo of what it looked like after we used the front loader to scrape the ground (we will double-dig this tomorrow):

preparing vegetable beds

We also started to dig the holes for the five trees that have been delivered already (3 different varieties of figs, 2 asian pears).

This is the first time I have ever looked forward to hard labor!! Can't wait until tomorrow...

-Giovanna